How to add a Call Button on WordPress?
The most complete guide for adding a click-to-call button to your WordPress website

The step to calling your business will never be smaller than when somebody is visiting your website from their cell phone. They’re already holding their phone in their hands. With a Call Button on your WordPress website they’re only one click and about 16 inches away from a conversation.
With this in mind, it’s clear that having a Call Button on your website is about as important as having an internet address. So let’s not waste any time and dive into the methods for adding one to your site!
What is a Call Button?
A Call Button is a button on your website that enables visitors to dial your (business) phone without having to find and copy your phone number, then opening their dialing application and then pasting the phone number again. The Call Button does all this work out of their hands. Clicking a Call Button opens the dialing application and refills the phone number automatically.
So the Call Button is a link or a button on a website that links to a phone number instead of a page or an action inside the browser. You are familiar with the hyperlink which is a clickable piece of text on the internet that generally links to another page on the internet. It’s because of hyperlinks that the internet is often referred to as the web since it’s quite literally a web of links between pages and websites. While the default hyperlink will point to an internet address that will be opened in the same browser application (e.g. Safari, Chrome, Edge), it is also possible to link to applications outside of the browser. A common example of this is the email link which will open an email application with the to-field prefilled. The same is possible with phone links where the user’s calling application will be opened with the phone number prefilled.
This means that a call link is just a variation of the standard hyperlink. And when adding a bit of styling to this link, for example with CSS or with an image, we can turn this into a Call Button. We’ve written a detailed Click-to-Call guide that will explain the technicalities of click-to-call links and how to code your own Call Button. It also gives your easy code examples that require minimal adjustments to work on your own website.
Now that you understand what a Call Button is, let’s see how we can add on to your WordPress website.
Adding a Call Button to a WordPress website
There’s a couple of ways you can add a Call Button to your WordPress website. Here’s a quick overview. Below we’ll go deeper into each one. The options are ranked from easiest to hardest.
- Using a WordPress plugin
- Using your visual theme builder
- Adding your own code
Adding a Call Button in WordPress with a plugin (easy)
By far the easiest and most flexible way to add a Call Button in WordPress is with a plugin. The Call Now Button is by far the most popular plugin for adding the Call Button and for the right reasons: it’s incredibly easy to set up, it’s super lightweight and if your needs become more demanding it can be extended to offer exactly what your business requires.
The Call Now Button plugin adds a circular call button to your site that is fixed to a position on the screen. This means that while the visitor can scroll through your pages, the button will not move and remain visible at all times in the same position. In more technical terms, this is called a floating action button: it’s basically floating on top of the website content.
Installing the Call Now Button WordPress plugin
Installation from the WordPress plugin library
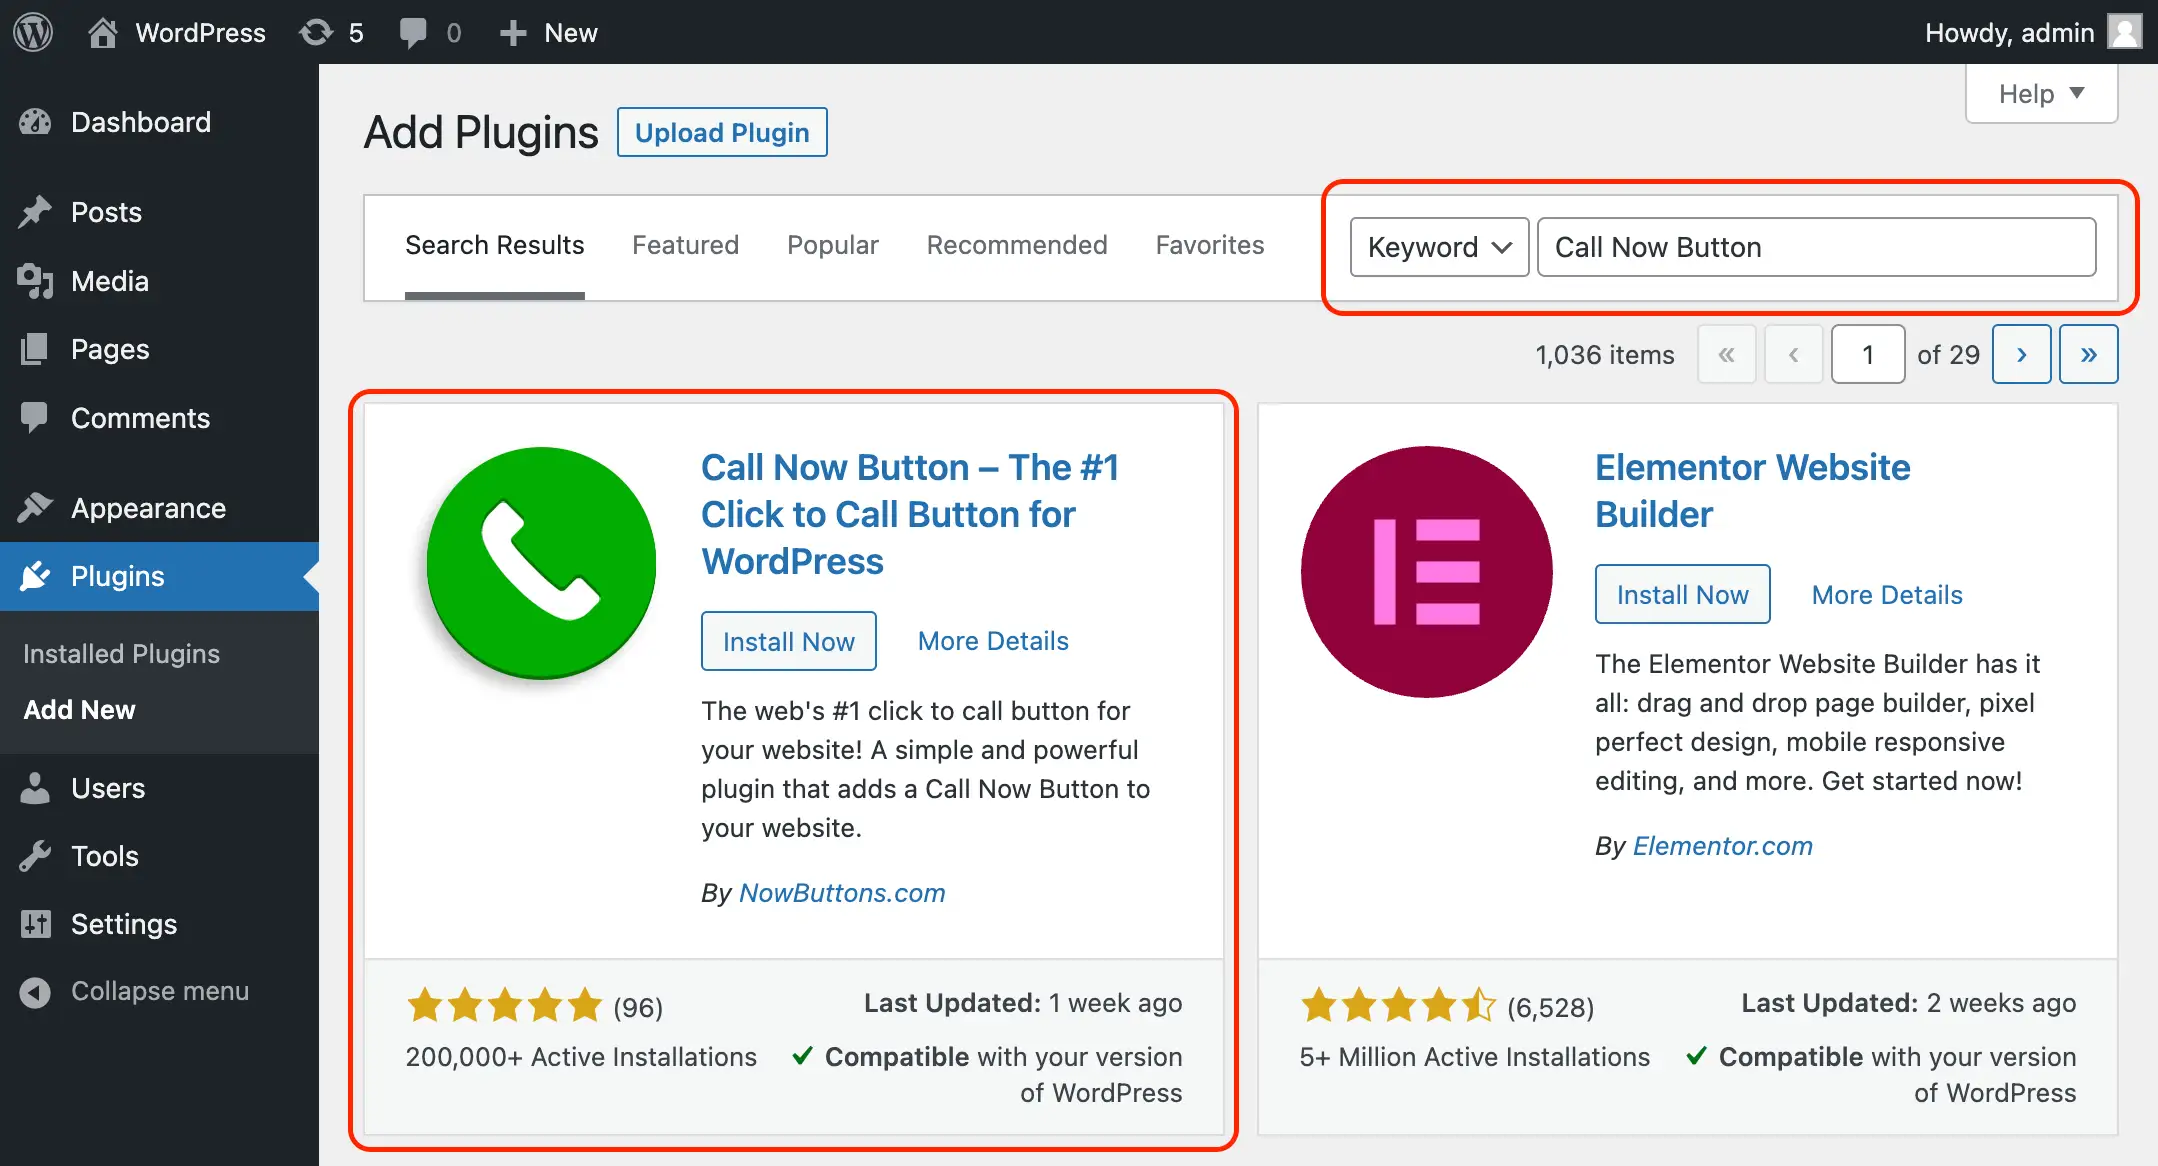
In your WordPress admin dashboard, go to the Plugins section and locate the Add new button at the top left of the screen. In the screen that appears, locate the search field and enter Call Now Button.
The first result will be the Call Now Button plugin. Click the Install button to start the installation. Once that’s done, click Activate to enable the plugin.
Manual plugin installation
If you prefer to install the Call Now Button plugin manually, you can download a zip file with the plugin files from the WordPress website. Go to the Call Now Button page inside the plugins folder on WordPress.org. Next to the plugin title you’ll see a big Download button. Click it to download the zip file. Save the file somewhere on your computer where you can easily access it later.
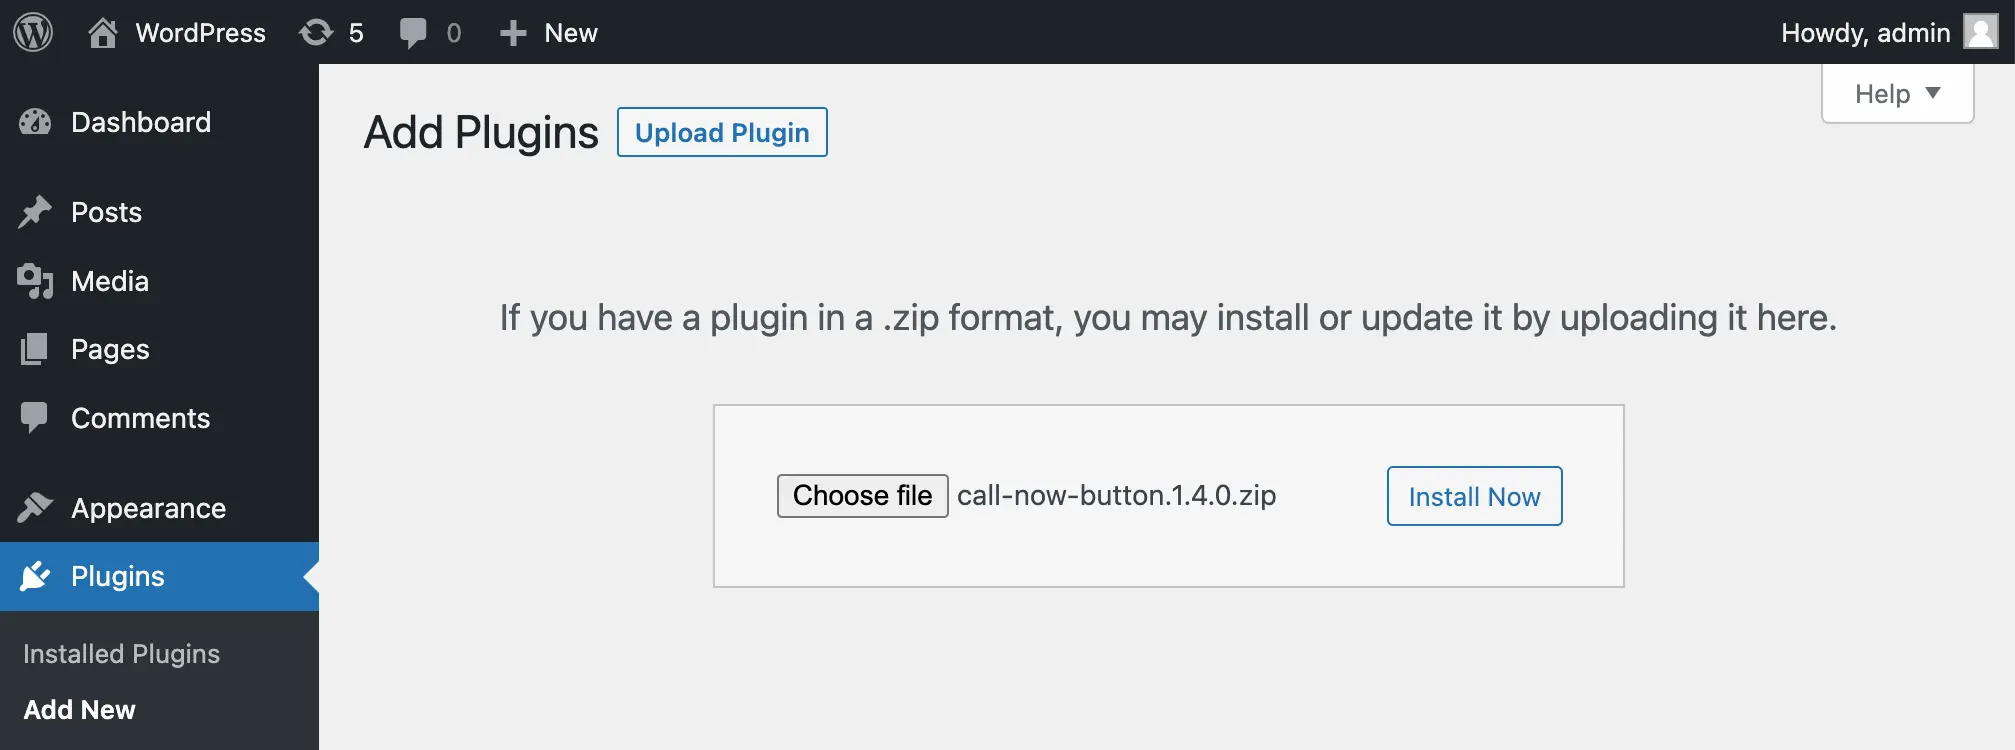
Now sign into your WordPress website and open the Plugin section. Look for the Add new button at the top left of the screen and click it. Now click the Upload plugin button at the top (same location where you found the Add new button previously). In the upload panel that appears, click Choose file button and locate the zip file you downloaded earlier. Now click Install now.
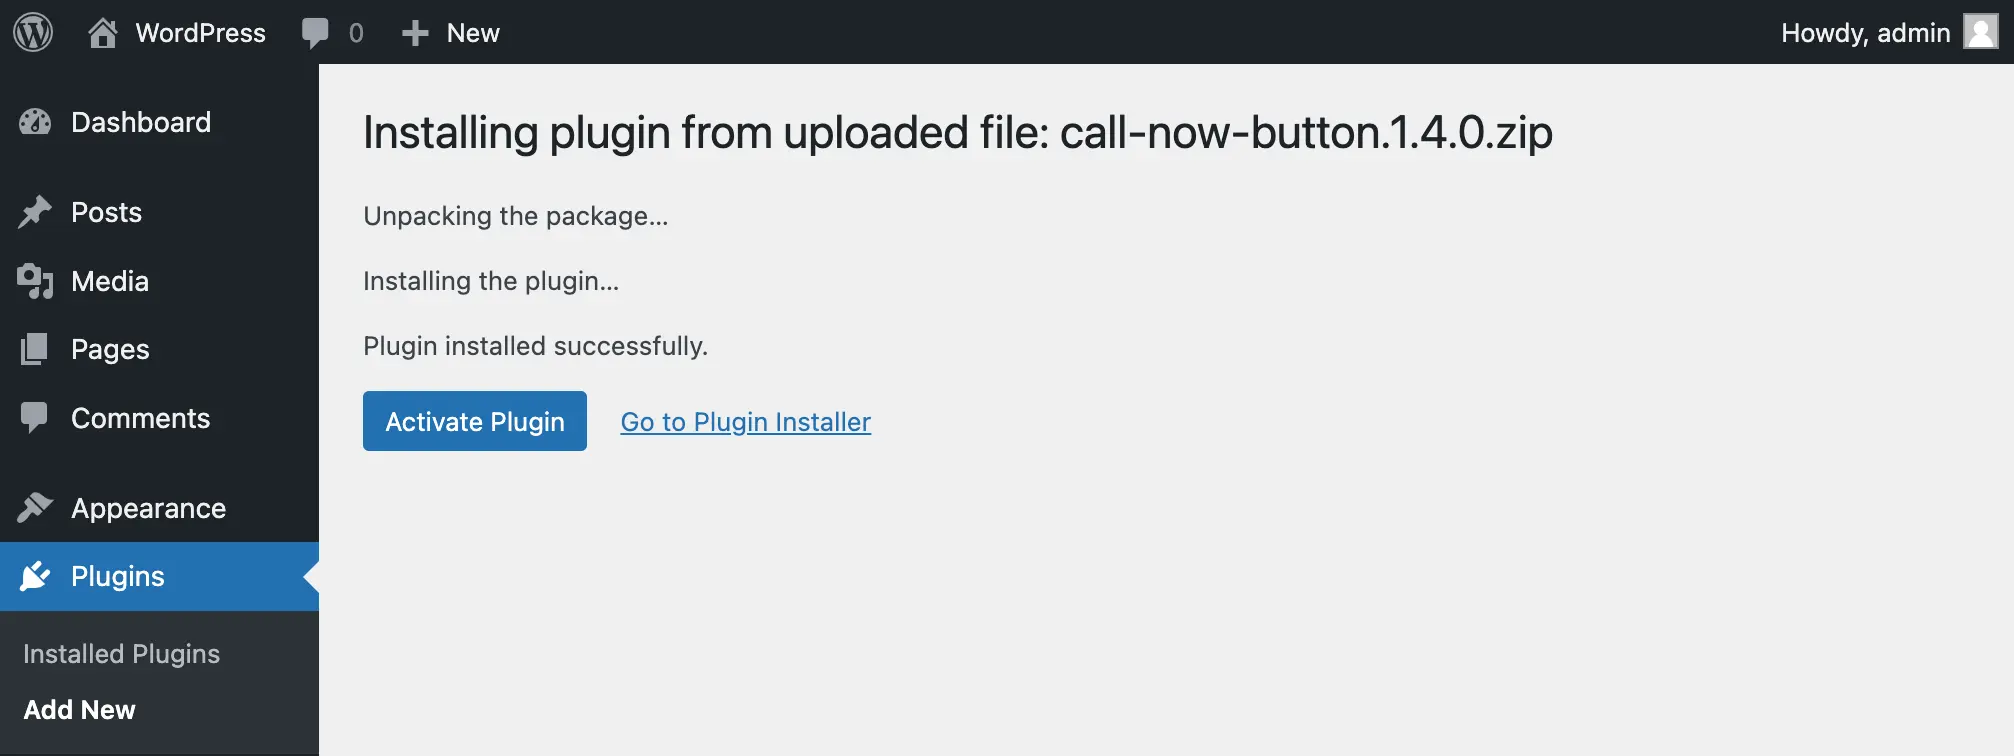
After a few seconds a screen will appear that shares the steps of the installation process and that everything was completed successfully. Click the Activate Plugin button to finalize the installation.
Creating your Call Button with the WordPress plugin
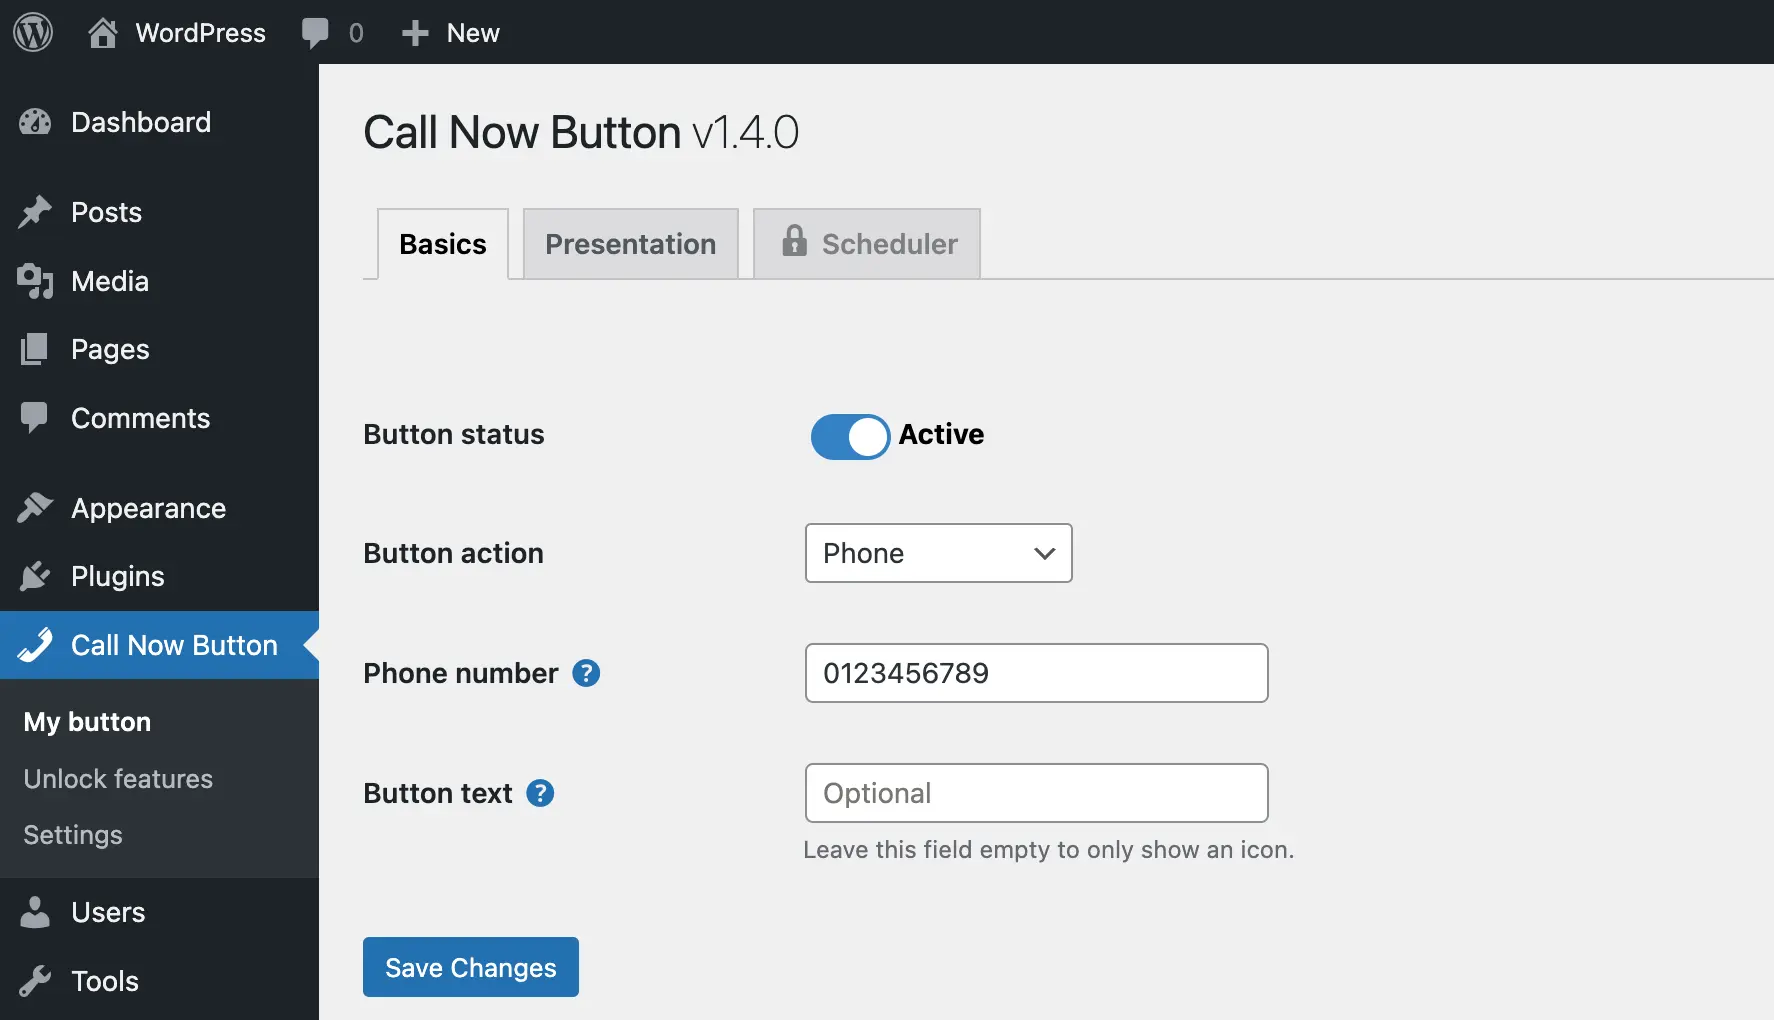
Now that you have installed the Call Now Button plugin, it’s time to create your Call Button. In the side navigation of your WordPress admin dashboard you’ll see a new option called Call Now Button. Click it to open the plugin.
The screen that appears only requires a little bit of input to create your Call Button and place it on your website:
- Your phone number
- The activation toggle should be set to Active to make sure the button is active on your website
Additional options
The steps described above are enough to have a green circular call button appear on all pages of your website. But obviously there are more options to change the appearance and modify the behavior of the button. Let’s go over the options you are most likely going to use.
Add a text label next to the button. So far we’ve talked about the most basic requirements for adding a call button to your site. We’ve limited ourselves to the Basics tab. But you might have noticed that there’s one more setting on that page we didn’t use. The Button text option. This option allows you to add a text label next to the button. The default call button has a phone icon which people are familiar with. However, extra focus or urgency can be drawn to the button by adding a text label. E.g. “Call us now for a free consultation”.
Changing the button colors. The default button is green with a white phone icon, but it is obviously possible to change the colors. To do so, open the Presentation tab. The first 2 options allow you to change the color of the button and the icon. A color picker makes this easy but obviously you can also enter your color code if you know the color you want.
Change the button position. By default the button is displayed in the bottom right corner of the screen. You can obviously change this to a different position. On the same Presentation tab you’ll find a Position setting where you can move the button to sit in a different position on the screen.
Hide the button on some pages. It’s also possible to set pages where the button should be displayed or remain hidden. By default the button will be visible on all your website’s pages. The Limit appearance setting on the Presentation tab allows you to adjust this. Every post and page in WordPress has a unique ID. Instead of entering full URLs, you can use these IDs to include or exclude pages from showing your Call Button.
Tracking clicks on the Call Button. The last option that I think you’ll be interested in is the option to track the clicks on the Call Button in Google Analytics. In the WordPress side navigation under the Call Now Button you’ll have a Settings page as well. Open the Settings page and locate the Click Tracking setting. Here you can select your version of Google Analytics. Click Save Changes at the bottom of the page to enable this feature. Once it’s enabled it will take about 24 hours before you start seeing your Call Button clicks in your Google Analytics dashboard.
These are just a subset of the options you have available in the Call Now Button plugin. As you can see, the plugin takes quite some work out of your hands and makes the entire process incredibly easy. Therefore we recommend using a plugin to add a Call Button on WordPress. But as we’ll describe below, there are also other ways for adding a Call Button to your WordPress website.
Adding a Call Button in WordPress with a visual theme builder
In recent years the use of Visual Theme Builders has become more popular. The most popular Visual Theme Builders are probably Elementor and Divi. At least that is what we’re seeing most often. Theme Builders give you a lot of flexibility to design your website’s appearance. If you don’t mind tinkering a bit with their options, it is often possible to create your own floating Call Button without touching any code with a Visual Theme Builder. If you’re interested in giving this a try, you should be able to find a video on youtube explaining how to do this.
Adding a Call Button in WordPress with code
Depending on your experience with writing code, this option can be either easy or hard. It will definitely be time consuming. But it is possible to write the code for a Call Button and add this to your theme files or maybe as an HTML widget. In our article about Click to call links we explain the code required for creating this yourself, including some code examples that you can freely use and adjust to your needs.
Click to call or click to contact?
I’d like to close this article with a final thought. While a Call Button is considered low hanging fruit: when a visitor is visiting your website on their mobile device, making it super easy for them to call you is easy to achieve and could potentially come with high rewards. But while all phones can make phone calls, they’re also used for a lot of other methods of communication. For example WhatsApp, Email, Text/SMS, Messenger just to name a few. So adding a click to call button to your website is a great first step, adding a bigger selection so visitors can pick their preferred method of contact is obviously even better.
Obviously you don’t want to lose any business, so if a visitor is uncomfortable picking up the phone but rather has a chat on WhatsApp or send you an email, that should be possible too. The more options you offer, the more prospects will feel comfortable to reach out. The Call Now Button offers a Call Button by default, but when you create an account with NowButtons you enable a whole list of additional channels inside the same plugin. The Multibutton and the Buttonbar allow you to add multiple channels to a single button. Try the 14 day free trial to see what’s possible and what it can do for your business.
Ultimately all these contact channels have one thing in common: the visitors that use them are engaged with your content and are ready to take the next step with you. They’re what we call hot leads. Which is the best kind of lead for any business right?
Give your website the only button it needs!
And get ready to triple* your inbound business!
*C. Mansfield from Manco Media (UK) reported his phone calls/messages trippled after installing it.